

請求書送付先に代わって下請業者請求書を作成する (ベータ版)
米国の Procore 顧客向け
 会社が「発注者 English」または「専門業者 English」のポイントオブビュー ディクショナリを適用すると、ユーザー インターフェイスに異なるツール名と用語の変更が表示されます。ディクショナリ オプションを適用する方法を学習します。
- 違いを確認するには:表示/非表示
目的
バックグラウンド
考慮すべきこと
前提 条件
ステップス
新しい請求書ページを開く
Users always create invoices in the project's Commitments tool.
- Navigate to the project's Commitments tool.
- Find the commitment to create an invoice for in the 'Contracts' tab.
- Click the Number link to open it.

- At the top of the commitment, click Create and choose Create Invoice from the menu.
Tip
Is the 'Create Invoice' option inactive? To learn why, hover your mouse cursor over the tooltip. This option only activates when Prerequisites are met.
This opens the 'New Invoice for [Contract Number]' page so you can update the General Information card.
一般情報カードを更新する
In the New Invoice page, update the General Information card. Once updated, continue by updating the Schedule of Values.
Note
The element circled in ORANGE is only available with Procore Pay.

- Learn how to update the General Information card as an invoice administrator: Show/Hide
-
General Information Card
This table details the elements in the 'General Information' card. An invoice administrator can update this information when creating or editing an invoice of behalf of an invoice contact.
Element Field Type Description Learn More Contract Company Read Only Shows the name of the subcontracting company designated as the 'Contract Company' on the commitment. To change the company name that appears: - Assign a different company to the commitment. See Create a Commitment.
OR - Change the company name by editing the company's record in the Project Directory or Company Directory.
Status* Drop-down list Accept the default status (Draft) or select a different status from the drop-down list. - When an invoice is ready for review, remember to change its status to Under Review.
- Once reviewed, remember to change its status to Approved or Revise and Resubmit.
What are the default statuses for Procore invoices? Invoice # Alphanumeric text Procore automatically assigns invoice numbers in sequence using its default numbering system or the custom numbering system defined for your project's invoices. Read Can I customize the numbering system for financial objects in Procore? before changing this number. Billing Period* Drop-down list Accept the billing period that appears by default or select any billing period from the drop-down list.
Note: Invoice contacts and users with 'Standard' level permissions on the Commitments tool can only select a billing period when an invoice is NOT already associated with it.Only invoice administrators can Create Billing Periods. Billing Date* Calendar control Shows the billing date for the selected billing period. You can change the date for this invoice with the calendar control. Only invoice administrators can Create Billing Periods. Period Start* Calendar control Shows the start date for the selected billing period. You can change the date for this invoice with the calendar control. Only invoice administrators can Create Billing Periods. Period End* Calendar control Shows the end date for the selected billing period. You can change the date for this invoice with the calendar control.
Note: To help project managers track how invoices impact a project's budget, the 'Billing Period' date on an invoice aligns with the work performed on a project.Only invoice administrators can Create Billing Periods. Billing Type: Progress Billing
Option button Requires Procore Pay
If the subcontractor is submitting progress billings for an ongoing project, choose this option.When your company has Procore Pay, this setting works with the Invoicing Settings for Progress Conditional and Progress Unconditional lien waivers. See Enable Lien Waivers & Set Default Templates on Projects. Billing Type: Final Billing
Option button Requires Procore Pay
If the subcontractor is submitting a one-time invoice or if this is the final invoice for an ongoing project, choose this option.When your company has Procore Pay, this setting works with the Invoicing Settings for Final Conditional and Final Unconditional lien waivers. See Enable Lien Waivers & Set Default Templates on Projects. Submitted Date Calendar control Select the date the invoice was submitted to your company by the subcontractor. Typically, this is printed on the invoice that you received from the subcontracting company. - Assign a different company to the commitment. See Create a Commitment.
-
支払詳細カードの更新
「支払いの詳細」カードは、 Procore ペイ の 請求書管理者 向けの「一般情報」カードの横に表示されます。
支払明細カード
この請求書の支払期日を変更するには、[支払期日] カレンダーから新しい日付を選択します。
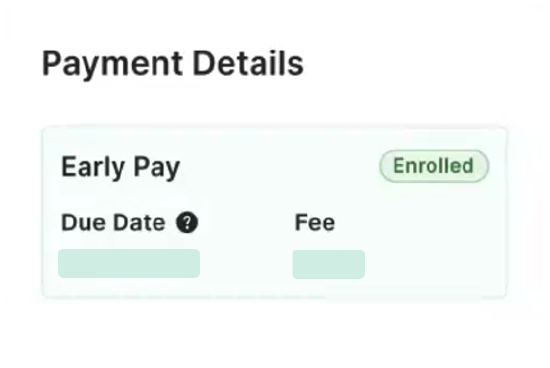
ベータ版 - 早期支払いプログラム
受取人が 早期支払いプログラムに登録されている場合、このカードには受取人の早期支払いプログラムの登録 ステータス、 期日、 および手数料が表示されます。 見る 早期支払い登録を 受取 人. Procore プロジェクトに割り当てられた早期支払いプログラムによって、 期日 と 料金が自動的に決定されます。 「早期支払プログラムについて」を参照してください。
予定価格表項目の保留金の設定と解除
添付書類を追加する
- 「添付書類」セクションまでスクロールします。
- 次のオプションから選択します:

- [ ファイルを添付 ] ボタンをクリックします。 これにより、[ ファイルを添付 ] ダイアログ ボックスが開き、コンピューターからファイルをアップロードできます。 完了したら、[ 添付 ] ボタンをクリックします。
又は - ドラッグ・アンド・ドロップ操作を使用して、コンピュータまたはネットワークから「添付書類領域」にファイルを移動します。
- [ ファイルを添付 ] ボタンをクリックします。 これにより、[ ファイルを添付 ] ダイアログ ボックスが開き、コンピューターからファイルをアップロードできます。 完了したら、[ 添付 ] ボタンをクリックします。
請求書を保存する
DocuSign© で請求書を送信する
随意: プロジェクト チームが Procore + DocuSign© 統合を使用して請求書の署名を収集したい場合は、ページ上部の [DocuSign© で送信] ボタンをクリックします。このボタンを使用するには、プロジェクトで DocuSign© との統合が有効になっており (「DocuSign® 統合を有効にするにはどうすればよいですか?」を参照)、請求書のステータスが [承認済み]、[承認済み]、または [承認待ち] である必要があります。DocuSign© との統合と署名用のエンベロープの準備の詳細については、「DocuSign®」を参照してください。
